The beauty of the cosmos is that it can fill any space with its vibrant colours and unique petals. Growing these extraordinary flowers from seed brings a special kind of satisfaction as if nurturing them provides an opportunity to connect with the natural world in which we all belong. As horticultural experts, let us share our knowledge on how to cultivate your own patch of cosmic wonder right at home!
Cosmos are easy-to-grow annuals that thrive in sunny locations with well-drained soil. With just a bit of effort, you can be rewarded with dazzling bursts of colour throughout the summer months. Planning ahead and starting seeds indoors will give your plants plenty of time to get off to a great start before transplanting into the garden or containers outdoors when temperatures are consistently warm.
By understanding the basics about sowing seeds, watering needs and fertilizing requirements, anyone can become a master gardener for their own outdoor oasis featuring beautiful cosmos blooms! In this article, we’ll discuss what’s needed to have success growing cosmos from seed so you too can enjoy having nature’s artwork gracing your garden beds or patio planters.
What Are Cosmos?
Cosmos are a popular flowering plant that can be enjoyed in many gardens worldwide. They come in various shapes and sizes, with some varieties reaching up to 4 feet tall! Cosmos is an easy-to-grow annual flower that blooms from summer until the first frost. The flowers range in colour from white and pink to purple and red – making it a great addition to any garden. Whether you’re looking for bright pops of colour or subtle hues, cosmos has something for everyone.
One of the best things about growing cosmos is that they’re quickly grown from seed at home. To sow your own cosmos seeds, simply prepare your soil by loosening it and adding organic matter like compost or manure. Then scatter the seeds directly onto the prepared bed and cover lightly with soil or mulch. Water them regularly, so the soil stays moist but not too wet as soon as plants reach 4 inches tall, thin out weak specimens leaving behind only the healthiest ones every 8–10 inches apart. If desired, you can also save some of your cosmos seeds each season for replanting next year!
Why Grow Cosmos From Seed?
Now that you know what cosmos are, let’s explore why you should grow them from seed. Growing cosmos from seed is a great way to get the most out of your garden’s potential. By sowing and planting cosmos directly from their seeds, you can choose from a range of varieties to suit your particular needs.
Cosmos make for an easy-to-grow flower with plenty of showy blooms and lush foliage. To ensure that your flowers reach their full potential, be sure to pinch out the growing tips when they reach around 20cm in height. This will encourage bushier growth and more flowers! If done correctly, these plants will be abundant with beautiful blossoms until autumn arrives – providing a long-lasting display of colour throughout the summer months.
With its minimal effort requirements, growing cosmos from seed is the perfect choice for novice gardeners or busy people who still want to reap all of the benefits of having this graceful flower in their garden. Whether planted alone or as part of a larger bedding scheme, these flowers offer charm and beauty without too much hassle – making it easier than ever before to enjoy nature at home.
Choosing The Right Seeds
Did you know that cosmos can be grown from seed in as little as 55 days? Choosing the right seeds is essential for achieving a successful crop of beautiful blooms. When selecting your cosmos seeds, look for packets labelled ‘dwarf’ or ‘bedding’ varieties. These are ideal for planting in beds and will produce short plants with large flowers. For containers, go for taller varieties that may reach up to 90 cm (3 feet).
I get my cosmos seeds from Wilko – I’ve always had good success with their seeds.
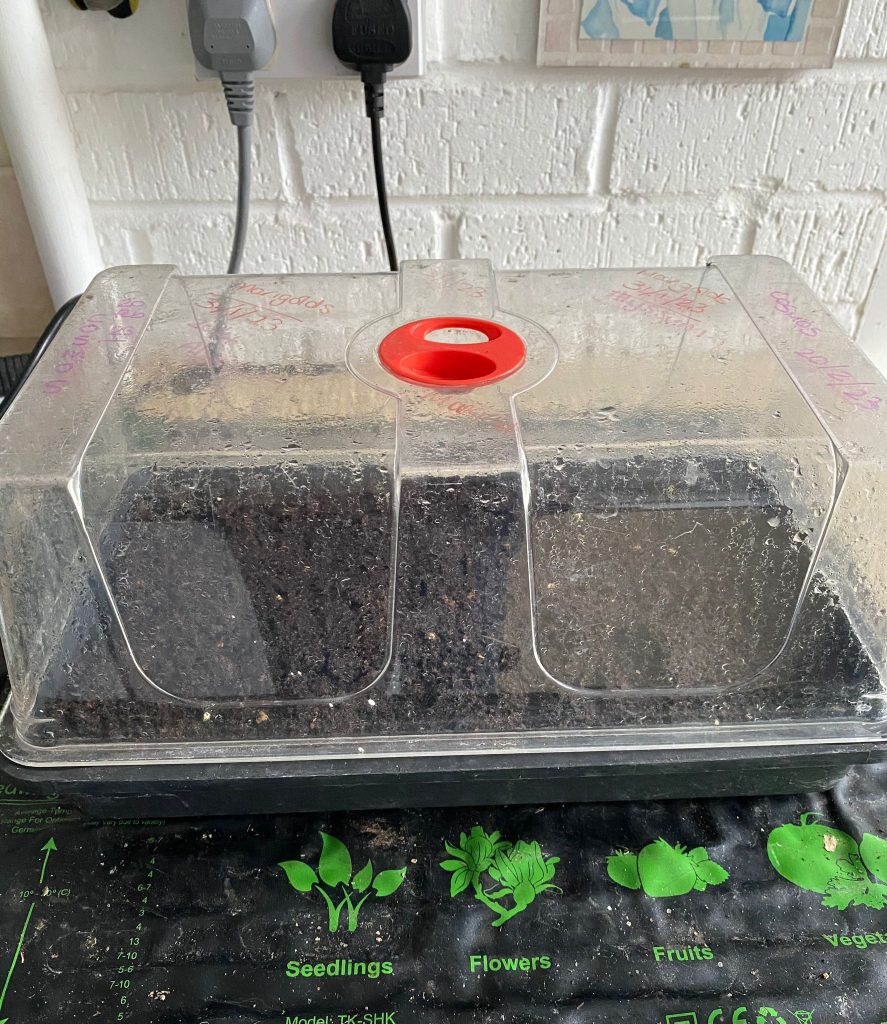
You have two options when it comes to sowing your cosmos – direct sowing into the bed/container or using a seed tray filled with potting soil. If you opt for a seed tray, then fill each compartment about half full before lightly pressing down the soil, followed by scattering 2-3 cosmos seeds per hole. Cover over lightly with vermiculite or compost and water gently. Once they begin to germinate, thin them out, so there’s only one plant per division and put these into their final positions in either beds or pots.
When putting together different heights of cosmos in containers, remember that dwarf varieties should always be planted at the front while tall types take centre stage behind them. That way, all components can be seen clearly without any being obscured!
Potting And Planting Cosmos Seeds
Now that you’ve chosen the right seeds, it’s time to pot and plant your cosmos! Growing cosmos from seed is easy – sow the seeds outdoors when all danger of frost has passed. Planting your cosmos in full sun will give them space to grow into beautiful flowers. When sowing new seeds, they can be sown indoors in trays or pots about four weeks before the last expected frost date. Fill a container with soil up to one-half inch deep, then sprinkle your seeds across the surface evenly. Lightly press down on each seed with your fingertips as you go. Water well and place in a sunny spot until germination occurs. Once sprouted, transplant outside for best results and enjoy watching them bloom throughout the summer months!

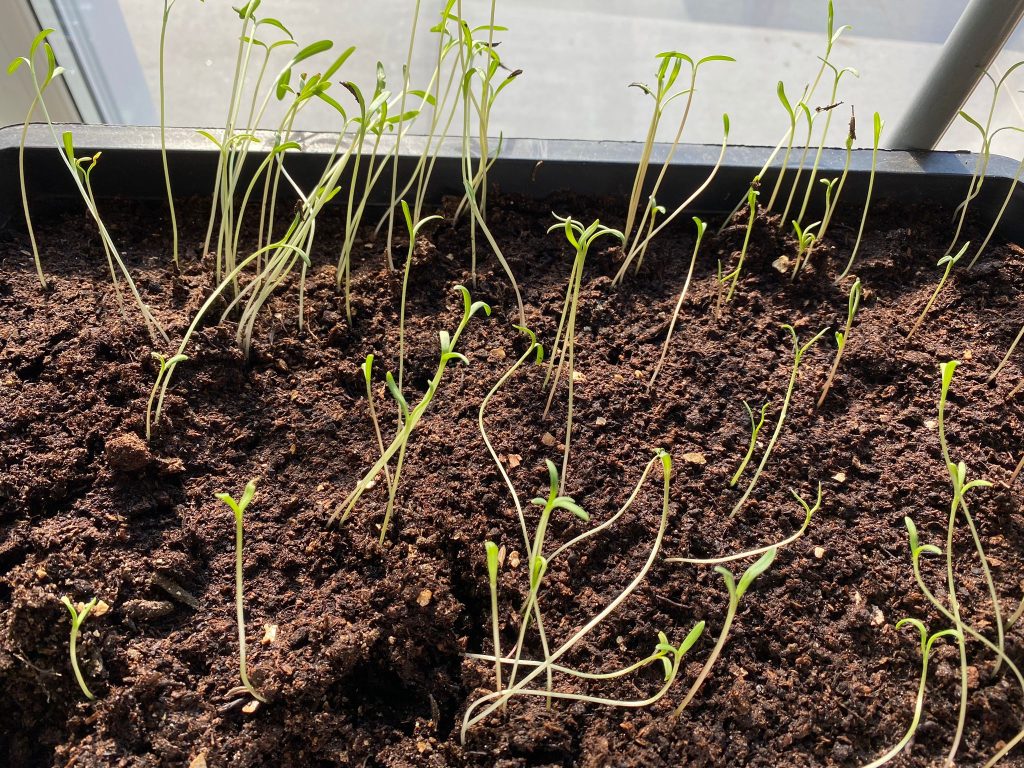
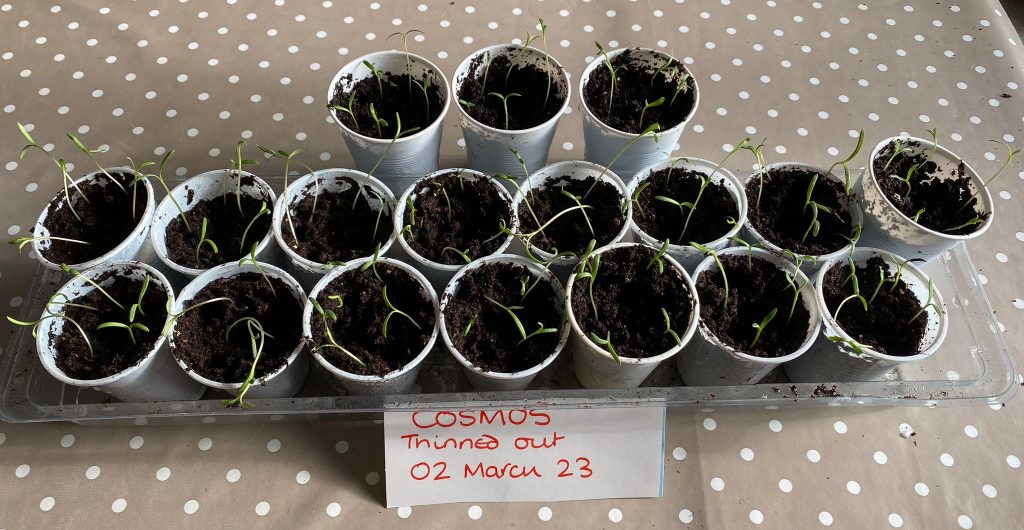
Around 10 days after planting, my lovely cosmos shoots get leggy so it’s time to thin them out and put them into pots.
Caring For Cosmos Plants
Research shows that cosmos plants can attract up to 20 species of butterflies, so they’re a great addition to any garden. Caring for your own cosmos is relatively simple, and the effort required will be rewarded with beautiful blooms all summer long. When growing from seed, pinch out the growing tip when it reaches around 20cm tall in late May to encourage bushy growth and flower heads. If you have taller varieties, consider staking them, as their stems may not support the weight of the flowers when fully grown. Water your cosmos plants regularly throughout the season, and make sure they get plenty of sun in a sunny spot in your garden or yard. Powdery mildew is an issue that can affect many types of flowers, including cosmos, but this disease can easily be prevented by ensuring good air circulation between plants. With regular watering and proper care, you’ll soon be enjoying a colourful display of cosmos!
When To Sow The Seeds Outdoors
Once you have decided to start your cosmos plants from seed, the next step is deciding when to sow the seeds. Generally speaking, it’s best to wait until March or April for outdoor sowing; this allows enough time for the flowers to bloom before summer ends. If you’d like cut flowers throughout the growing season, then consider starting indoors during late winter and transplanting outdoors in early spring.
Cosmos can be grown from seeds relatively easily. They require full sun and well-draining soil. After a frost has passed, sow the following: evenly distribute 1/4 inch of compost over each area where you plan on planting cosmos from seed, followed by a light layer of sawdust mulch. This will help keep the soil moist while encouraging the germination of those precious little cosmos! Once they’ve sprouted up above the surface, thin out any excess shoots so that only several are left per square foot. With proper care and attention, these beautiful blossoms should begin blooming within 8-10 weeks after being planted!
Growing Guide For Best Results
It’s time to start planning your garden! Cosmos are one of the easiest flowers to grow from seed, and they will bring a splash of colour – pinks, whites, reds, oranges – that you can enjoy all summer long. Now is the perfect time to begin sowing seeds after the last frost has passed.
The best soil for cosmos is loose and well-drained with plenty of organic material added in; if you’re working with poor soil, you’ll want to amend it by adding compost or peat moss before planting. Once planted at least 1/4 inch deep, water regularly and thin the plants out when they reach 2 inches tall. Make sure not to cut off their growing tip, as this can stunt further growth. You should also be mindful of protecting them from frost until around mid-spring or early fall, depending on where you live, since temperatures below 28 degrees can damage them beyond repair. After the first frost, however, there won’t be much more need for concern as these resilient annuals tolerate cold weather easily.
Cosmos make great additions to flower beds, borders and containers alike, so go ahead and get started today! With proper care and attention throughout their bloom period extending into late autumn, you will surely have a showstopper for many months each year.
Staking To Support Taller Varieties
Cosmos are annuals that put on a show of colour in the garden. If you want to grow and care for cosmos, staking can help support taller varieties while they reach their full beauty. Stake your plants when young, so they don’t get damaged as they mature into strong stems with heavy blooms. Cut off any dead flowers or leaves throughout the growing season to keep them looking healthy and encourage more growth.
When it comes time to set the seed, gently tie up the tallest stems together near the base if needed for extra support. This will ensure that your tall cosmos have enough structure to stand upright until ready for harvest. For more tips on best caring for cosmos, consult our complete guide on Growing and Caring for these beautiful blooms!
Easy Tips For Blooming Flowers
Growing cosmos from seed is one of the easiest flowers to grow. They can get up to six feet tall; however, they will need staking if you want them to reach their full potential. Cosmos are also great self-seeders—plant your seeds in the garden, and next year you’ll have buckets of cut flowers!
When planting cosmos, use a well-draining soil mix with plenty of compost or other organic matter added for nutrition. The best time to plant these blooms is when nighttime temperatures remain above 55 degrees Fahrenheit. Plant the seeds about 1/2 inch deep and cover lightly with soil; then water thoroughly. You don’t need any supplemental fertiliser–the compost should be sufficient for your plants’ needs. Place the pots in a sunny location until the seedlings emerge within ten days. When it’s safe to transplant outdoors, choose an area with at least 6 hours of sun per day and space each plant 10 – 12 inches apart in all directions. Water regularly throughout their growing season (April through October). To ensure continuous bloom cycles, deadhead spent blossoms as soon as possible after flowering has finished so that new buds form quickly.
Cosmos are easy to grow and require very little maintenance once established. With just a bit of patience and care, you’ll enjoy beautiful wildflower bouquets all summer long!
Fertilising And Watering Requirements
Growing Cosmos from seed is a gardening pleasure. These beautiful and bright flowers are definitely worth the effort! To get started, plant cosmos seeds in a cold frame or directly outdoors for transplanting later on. You don’t need any special fertilisers to grow these beauties – they love organic compost and aged manure.
Cosmos also don’t need much water; however, it’s important not to under-water them either. Chocolate cosmos do best when watered twice a week with an inch of water each time. This will ensure their roots get enough moisture while avoiding over-watering, which can cause disease and root rot. If you’re unsure if your plants have had enough water, simply stick your finger into the soil around the base of the plant – if it feels dry, then it needs watering!
By following these simple steps, you’ll be able to enjoy vibrant blooms all summer long that attract butterflies and bees alike! So what are you waiting for? Get out there and start growing some gorgeous cosmos today!
Common Problems And Troubleshooting Solutions
Cosmos are among the floweriest plants in the world, and when grown from seed, they can bring a real splash of colour to any garden. However, it’s important to know what problems you may encounter along the way so that you can troubleshoot effectively.
Slugs and snails love to munch on young cosmos shoots, leaving behind ragged-looking foliage. To keep them away, simply lay down some slug pellets around your seedlings – this should do the trick! Also, ensure that you only water at ground level rather than wetting the leaves, as this will attract slugs. Bees and other pollinators also flock to cosmos flowers, so don’t be surprised if one or two find their way into your garden while they’re out foraging.
Adding stakes is an effective solution if tall varieties start flopping over due to windy conditions. Place each stake close enough to support several stems without damaging them; tie with soft twine or cloth strips for extra stability. Once established, cosmos need very little maintenance apart from deadheading spent flowers – this encourages more blooms in quick succession, so you get the next flower in no time!
Harvesting Seeds From Cosmos Flowers
Harvesting seeds from cosmos flowers is a great way to grow wide varieties. For example, my friend Bob loves to grow lots of cosmos in his garden, but he noticed that some plants had fewer flowers than others. After investigating further, he realized the difference was due to which type of seed he used for each plant. By harvesting seeds from the more vibrant and plentiful flowers, Bob was able to replant with much better results.
The best time to harvest seeds from your cosmos flowers is when they start turning brown or after all their petals have fallen off. Gently cut open the flower head and remove the black or dark-coloured seeds inside. Place them on a sheet of paper and leave them out until completely dry before storing them away in an airtight container. Make sure you label what variety it was as well, so you know exactly what you are planting next season!
Preserving And Storing Flower Heads
Preserving and storing flower heads from your cosmos is a great way to ensure that the beauty of your garden lasts long after they have bloomed. To preserve them, pick the flowers when fully open and place them in a paper bag or container with peat moss. This will help keep them dry until you’re ready to store them. Once you’ve done so, it’s time to put on your thinking cap! Think of creative ways to display these beautiful works of art – whether displaying them as part of an arrangement for indoor decor, making wreaths out of dried flower petals, or pressing them between two sheets of parchment paper – there are endless possibilities!
Storing seeds from your cosmos can also prove useful if you plan on growing more next season. Seeds should be stored at room temperature in airtight containers like glass jars or plastic bags; this will prevent moisture from entering and compromising their viability. Additionally, label each seed packet so that you know where and when it was collected. With proper storage techniques, you can enjoy the fruits (or rather, the flowers!) of your labour for years to come!
Companion Planting With Cosmos
Now that you know the best way to preserve and store your flower heads, it’s time to shift gears and discuss companion planting with cosmos. When it comes to growing these beautiful blooms, as a horticulture expert, I can tell you that there are few more rewarding tasks than harvesting them from seed! Cosmos come in wide varieties which thrive when planted together; they require plenty of sun, so make sure to choose an area with long hours of direct sunlight.
When companion planting with cosmos, group taller plants along the north side of the bed or garden area for maximum exposure. Also, mix different types of cosmos within each variety: by doing this, you will create depth and texture and ensure colourful blooms throughout the season. Planting flowers such as coreopsis or daisies around the edges of a grouping helps break up long stretches of greenery while also providing pollinators like bees access to nectar-rich blooms.
It is important to note that although cosmos are relatively easy to grow from seed, some patience is still required since germination may take up to two weeks or even longer, depending on soil temperature and other factors. To get started growing these vibrant beauties from scratch, simply purchase seeds online or from any gardening centre near you – just remember to follow package instructions carefully!
Design Ideas For Landscaping With Cosmos
Cosmos is a versatile and beautiful flower that can light up any landscape design. When planted from seed, creating unique looks with them in your yard or garden is easy. Whether you’re looking for something low-maintenance or an eye-catching statement piece, cosmos has got you covered!
Several options are available for those who want a more natural look. Planting cosmos seeds in long rows will create a field of wildflowers blooming throughout the summer months. The tall plants also make great backdrops for shorter flowering varieties like coneflowers, daisies and black-eyed susans – perfect for creating contrast in your landscaping. For those looking for something more formal, groupings of cosmos near pathways or around entryways provide just enough colour without overwhelming other elements in the design. If you’re feeling adventurous, try growing different colours together to create an ombre effect as they bloom outwards from each other.
No matter your design ideas when landscaping with cosmos, these flowers offer stunning beauty and versatility that will bring life into any outdoor space!
Conclusion
As an avid experienced gardener, I can confidently say that growing cosmos from seed is a great way to add bright pops of colour and texture to your garden. It’s easy to do, too – all you need is the right seeds, soil, and regular care! With just a few simple steps, you’ll be well on your way to having beautiful blooms in no time.
Caring for cosmos plants isn’t difficult either: they’re like little sun-loving children, asking for nothing more than plenty of sunshine and water. And if you give them what they need, you’ll be rewarded with an abundance of stunning blossoms that look like constellations dotting the night sky – perfect for any outdoor space.
Finally, companion planting with cosmos adds another layer of interest to your garden. By pairing these vibrant flowers with other colourful varieties, such as petunias or marigolds, you can create visual harmony that will captivate anyone who visits your space. So don’t wait – get started today and enjoy the beauty of cosmos all season long!